Create a Godot Project
Godot Launcher creates a project folder, prepares the selected tools, and adds the project to Projects. You can also publish the new project to a private GitHub repository.
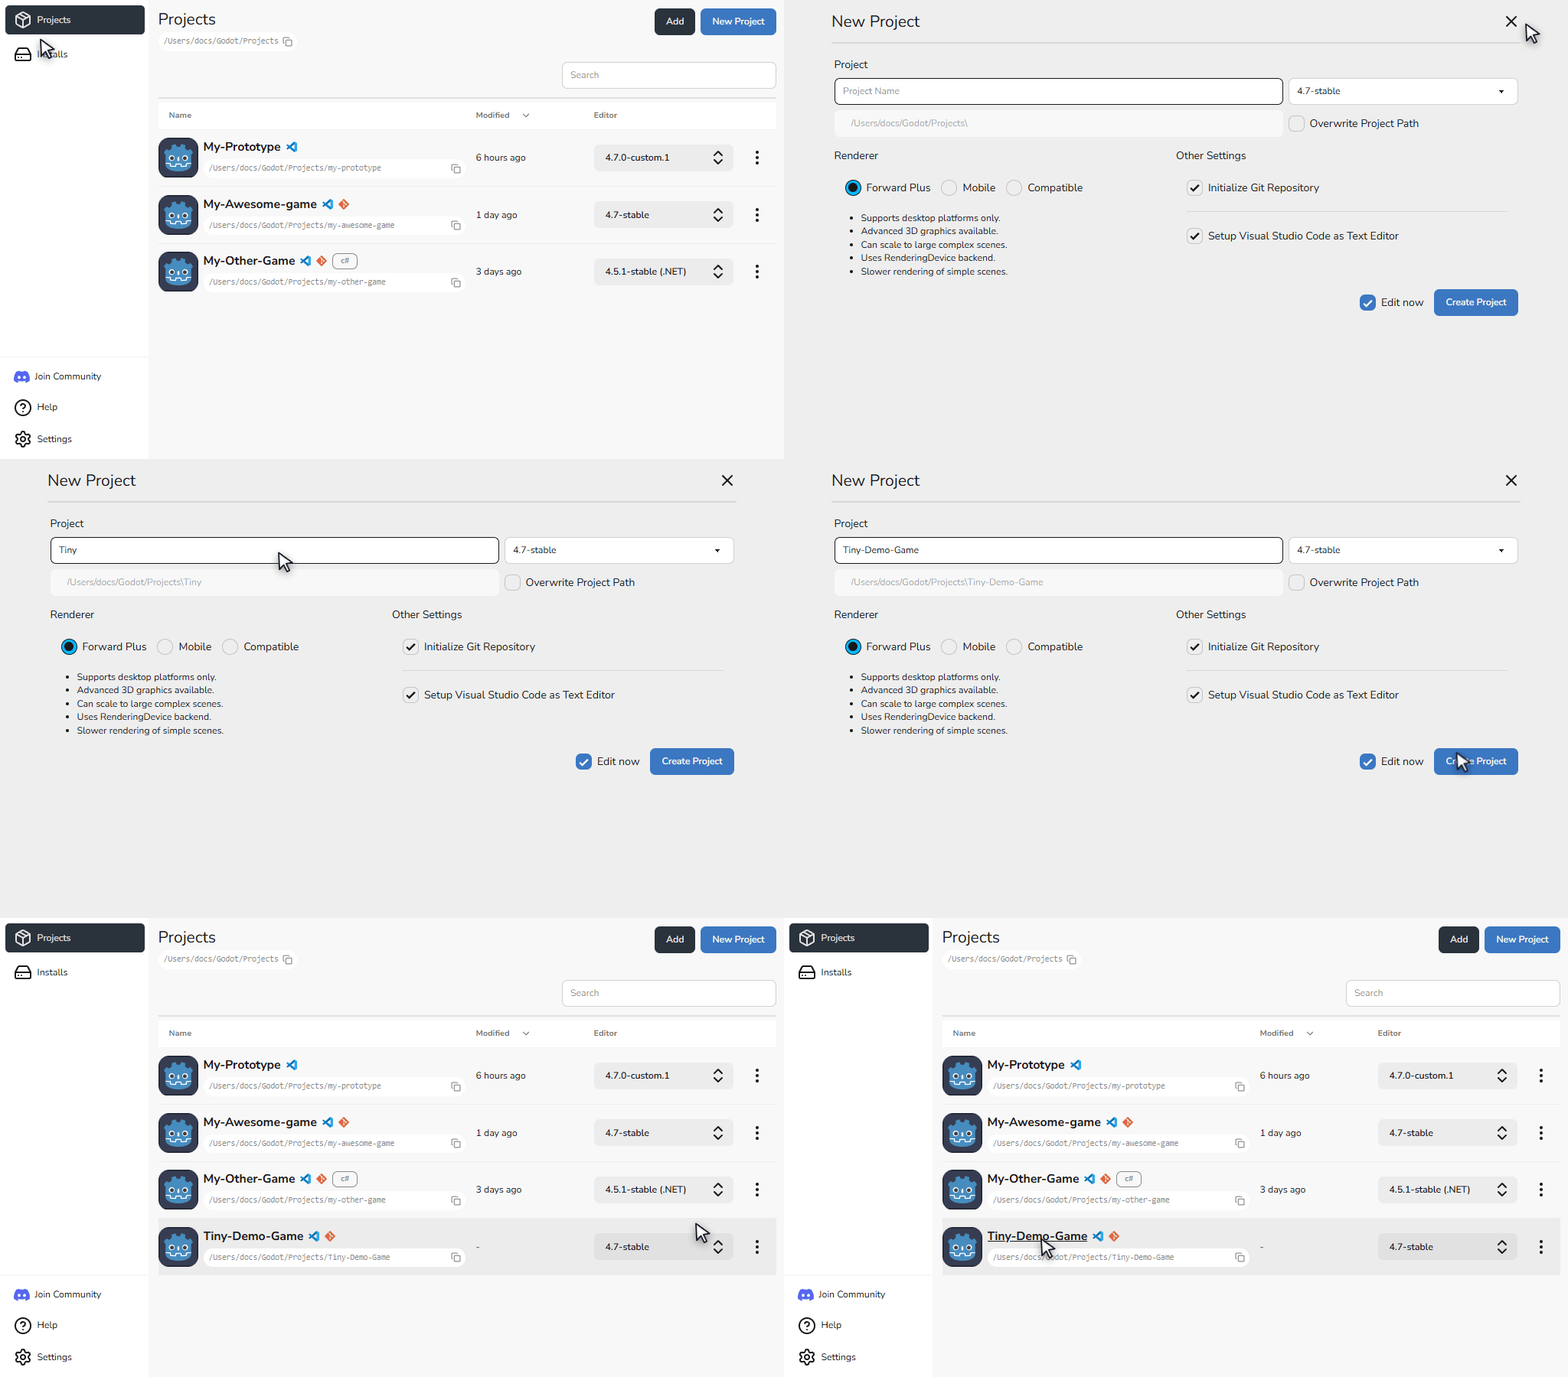
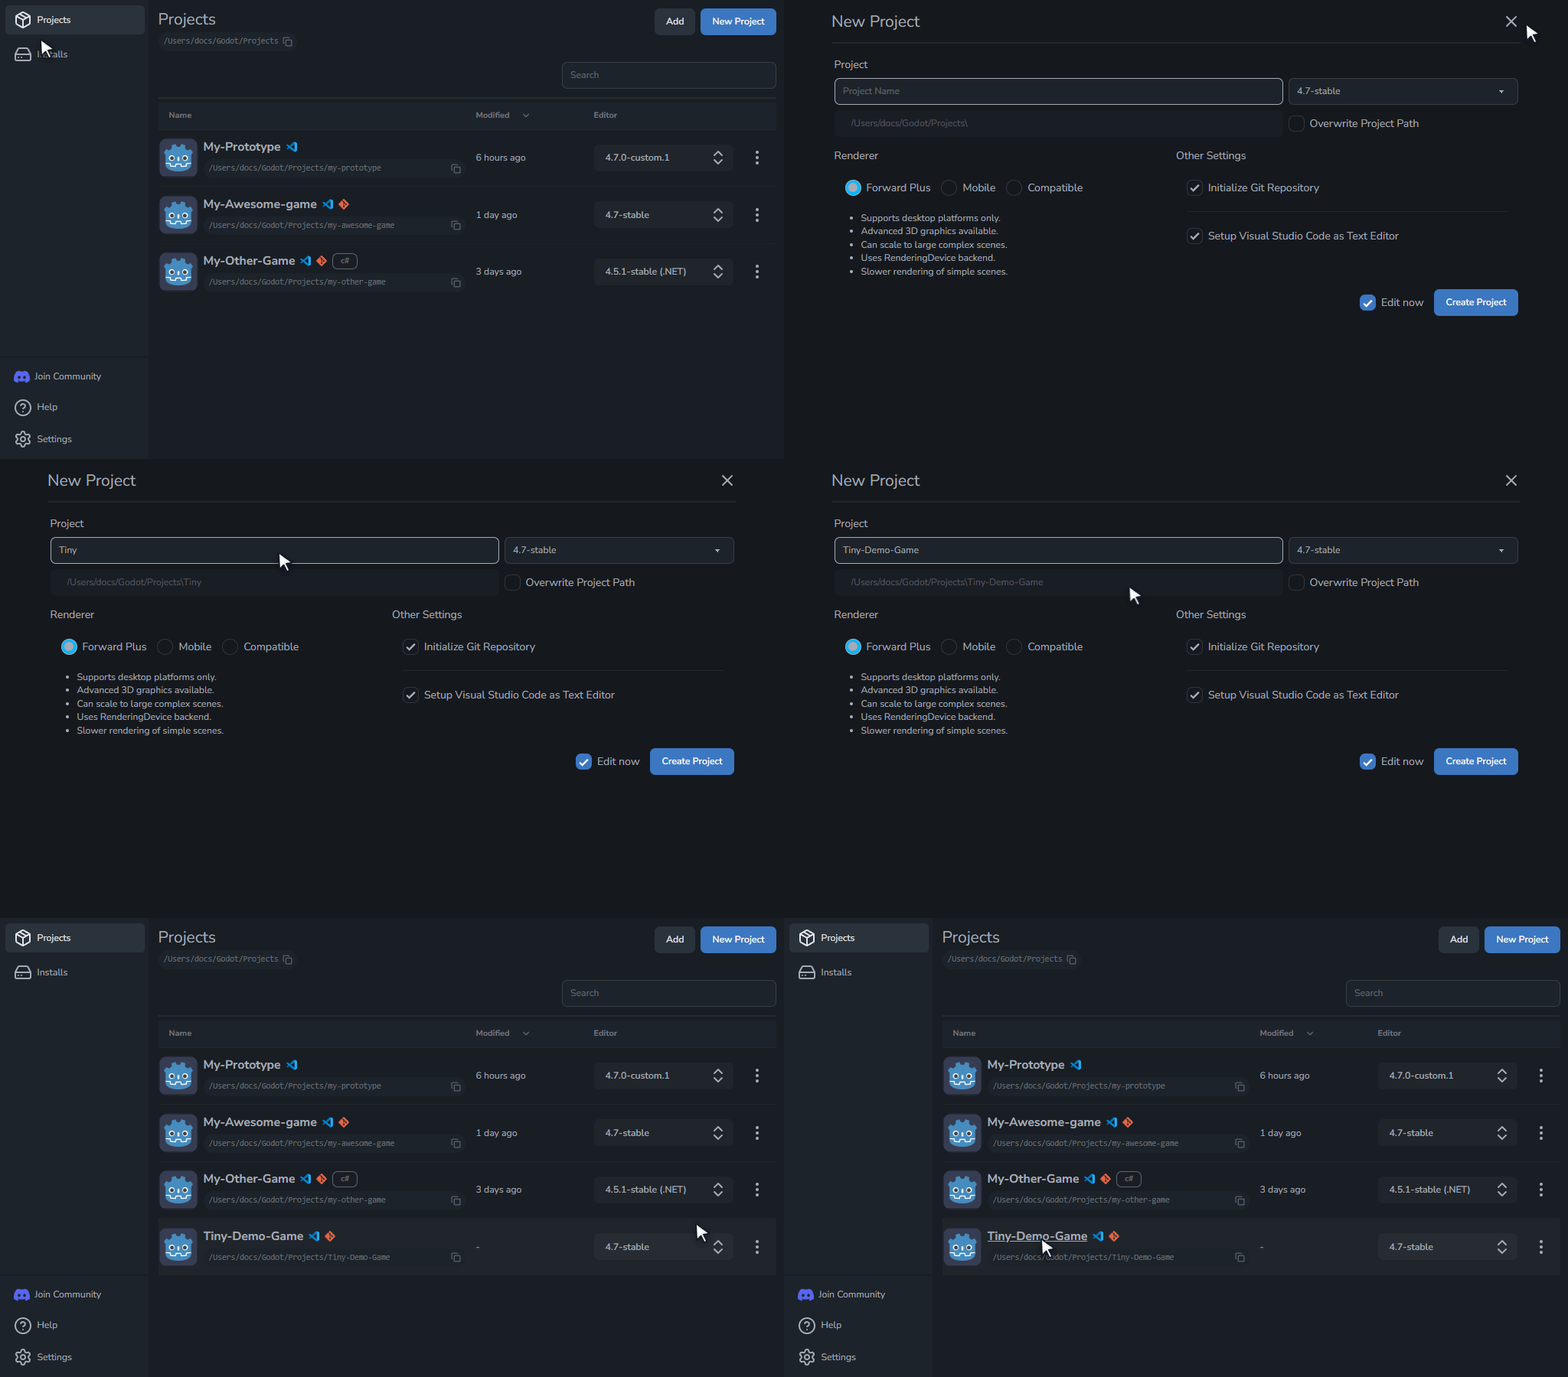
Create a project
- Open Projects and select New Project, or Create project from the empty welcome screen.
- Enter the project name and check Project location.
- Choose the Godot editor and Renderer.
- Choose a code editor and whether to initialise Git, use Git LFS, or publish to GitHub. The sections below explain these choices.
- Leave Edit now enabled to open the project when it is ready.
- Select Create Project. If the editor needs downloading, select Install and create project instead. When publishing is enabled, these actions become Create and publish to GitHub or Install, create and publish.
The project appears in Projects after creation. If Edit now is enabled, Godot opens it with the selected editor.
Choose the project folder
New projects use the parent folder set in Settings > Projects > Project Location. Edit Project location or use its browse button to choose a different parent folder for this project. Select Use default location to return to the saved setting.
The folder preview shows the folder that will be created. For example, My Next Awesome Game uses My-Next-Awesome-Game as its folder name.
The destination must be available and empty. If it already contains files, choose another location or add the existing Godot project.
If the chosen folder is inside a Git repository, the launcher asks before creating the project. Select Cancel to choose another location, or Continue to create the project without a separate repository, initial commit, Git LFS setup, or GitHub publication. The completion message lists the actions skipped.
Choose the Godot editor
Choose an installed editor, including a registered custom build, or select Browse releases to choose an official editor to download. Use Stable or Pre-releases and Standard or .NET to find the build you need.
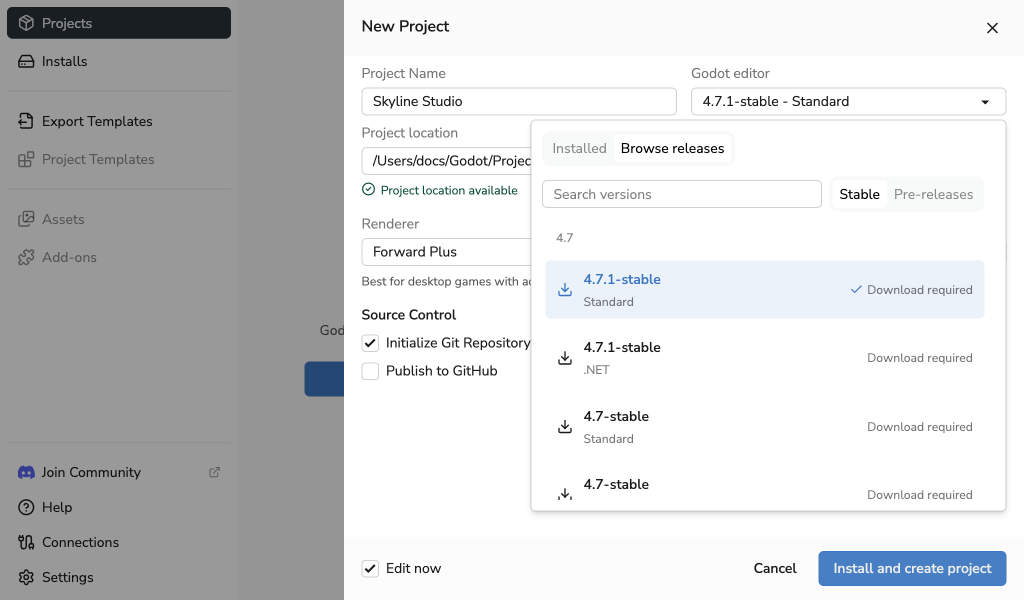
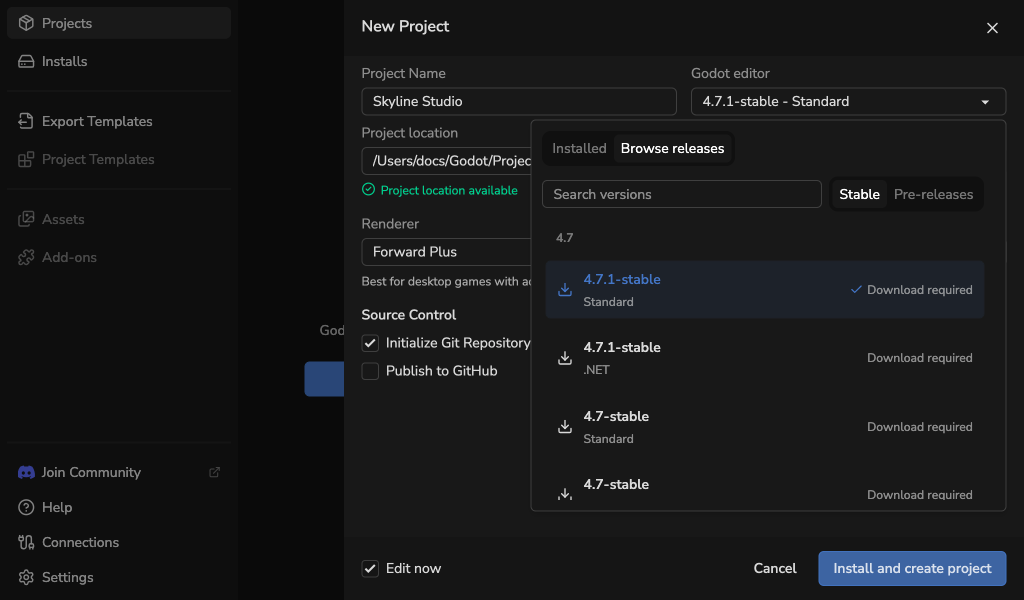
A downloadable editor is installed before project creation. Keep Godot Launcher open while setup finishes. If the release catalogue cannot load, select Retry.
If installation fails, the project has not been created. Dismiss the alert to return to the form and try again. If project creation fails, review the error and the chosen folder before retrying. If only the editor launch fails, the created project remains in Projects; open it from there.
Choose a code editor
Choose Visual Studio Code or VSCodium to open project scripts in that editor, or None to leave external code editor integration off. Your default code editor is preselected when available.
See Code Editor Settings to set the default or configure a missing editor.
Set up Git
When Git is available, Initialize Git Repository is enabled by default. It creates a main branch and an initial commit. The launcher adds default .gitignore and .gitattributes files even when Git is disabled or unavailable.
Enable Use Git LFS to configure tracking patterns for assets. Open the help panel beside the option to review the file types before creating the project.
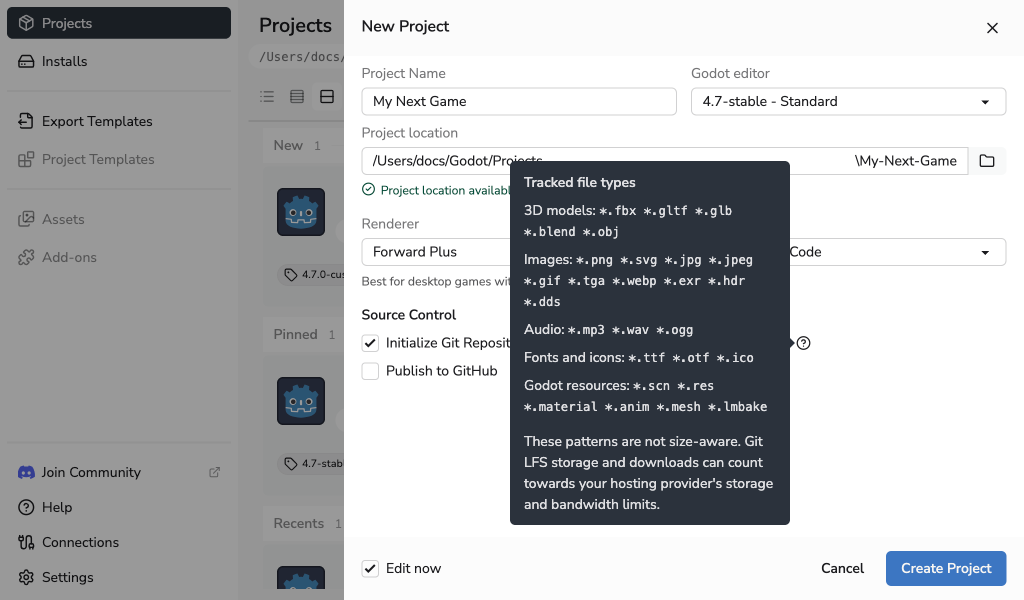
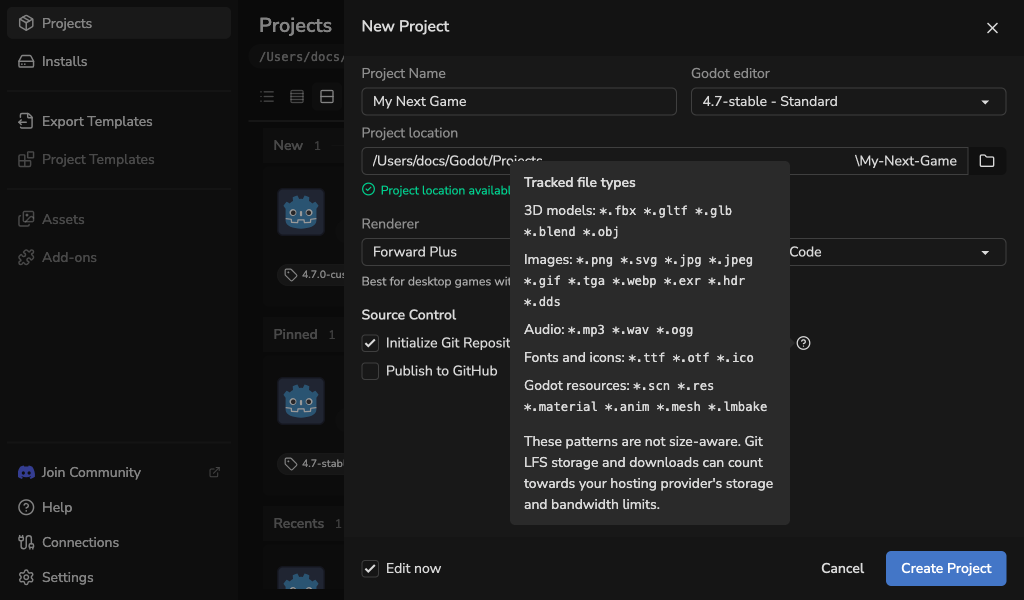
Git LFS setup applies to new repositories created by Godot Launcher. The patterns apply by file type, not file size; your Git hosting provider may charge for storage and downloads.
Git needs a name and email for the first commit. The launcher uses your configured identity or asks you to choose one. If no complete identity is available, select Add Git identity or Skip initial commit. Skipping the commit leaves the new files uncommitted and prevents GitHub publication during creation.
See Using Git With Godot Launcher for identity choices, presets, and generated files.
If Git or Git LFS is unavailable, check Settings > Tools. You can create a project without Git, or use Git without Git LFS.
Publish a new project to GitHub
Publishing creates a new private repository and pushes the initial main branch. It requires Git, a complete commit identity, an initial commit, and a GitHub connection with publishing permission. Git LFS must also be available if selected.
- Enable Initialize Git Repository, then Publish to GitHub.
- If prompted, select Connect GitHub and complete the browser steps. Your project form remains available when you return.
- Choose the Owner and Repository name. The owner can be your connected personal account or an organisation.
- If Name already in use appears, choose another name. Name looks available is a preliminary check; GitHub confirms availability when creating the repository.
- Select Create and publish to GitHub, or Install, create and publish if the editor needs downloading.
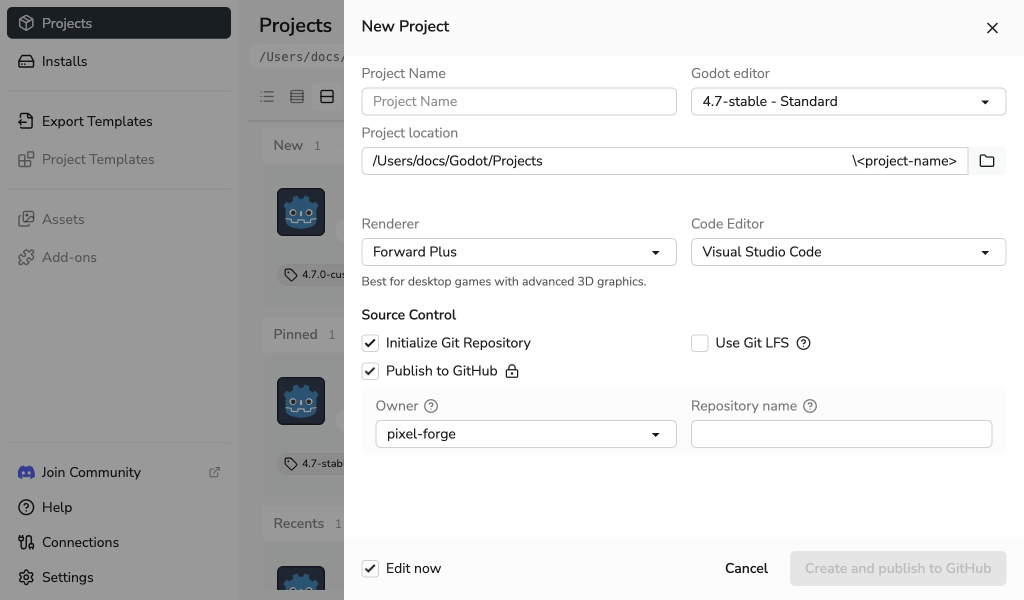
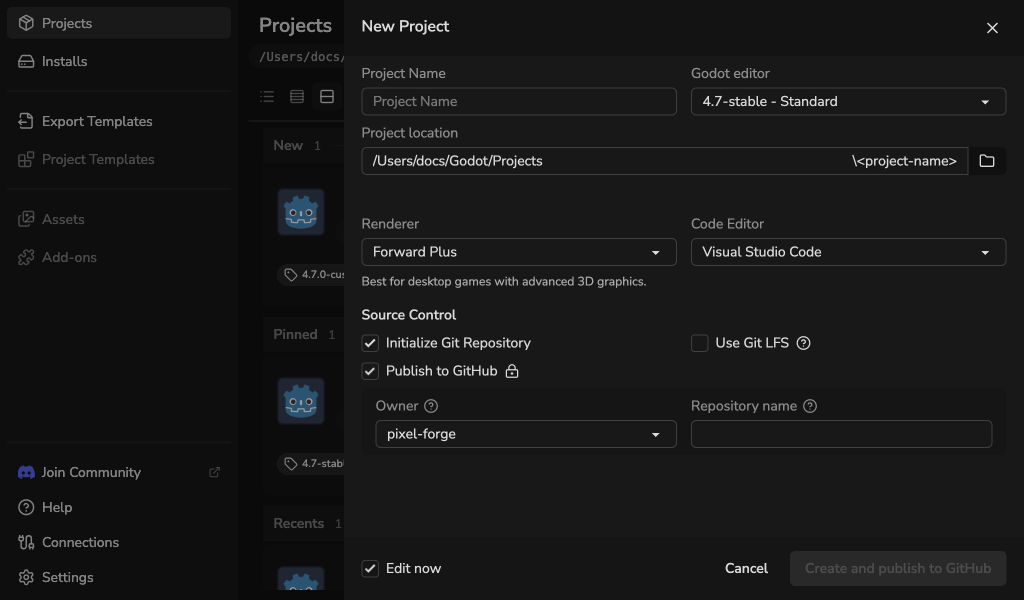
The launcher creates the local project first, then publishes it. After publication, select Open in GitHub from the project's folder menu to open its repository page.
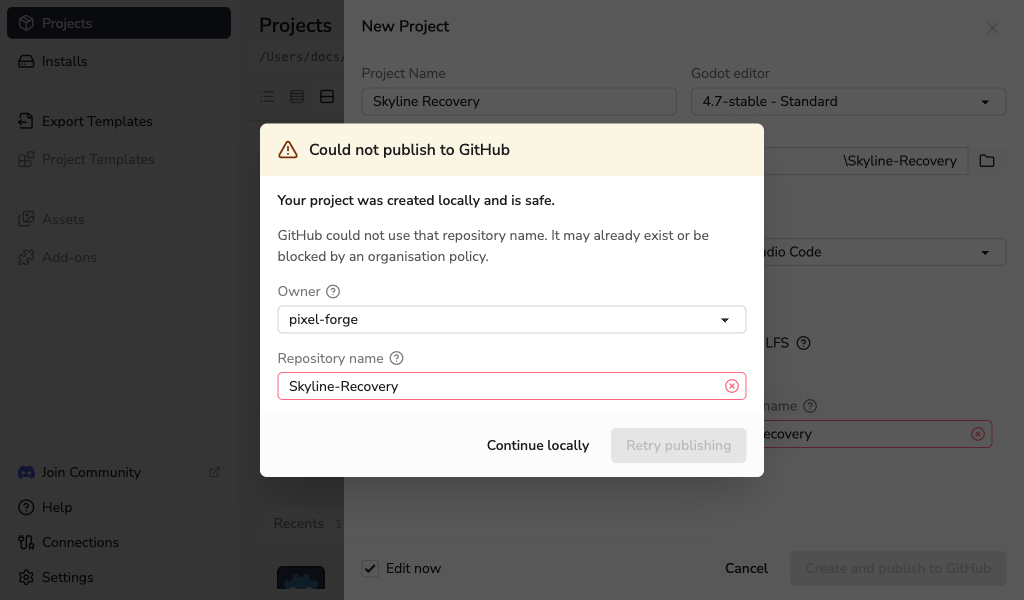
The local project remains in Projects, and a repository already created on GitHub is kept. Follow the recovery dialog to correct the owner or name and retry. Use Check and retry when the result of a network request is uncertain; the launcher asks before using an empty repository found by that check. Select Continue locally to finish without publishing in this session.
See Connections for GitHub access and How GitHub Connections Are Protected for permission and credential details.