Visual Studio Code Setup for Godot
Visual Studio Code is supported by Godot Launcher. Choose it for a project to open Godot scripts in VS Code and keep the workspace setup up to date.
Godot Launcher does not install VS Code or its extensions.
Install Visual Studio Code
Download and install VS Code from the official Visual Studio Code download page.
Then make it available in Godot Launcher:
- Open Settings > Code Editors.
- Find the Visual Studio Code card and select Rescan.
- Keep the editor Enabled so you can choose it for projects.
Select the star to make VS Code the default for new projects. See Code Editor Settings for custom paths and launch arguments.
Choose VS Code for a project
Choose VS Code in either workflow:
- In New Project, use the separate Code Editor selector before creating the project.
- For an existing project, select the project card's Project settings action, open the Code Editor tab, choose Visual Studio Code, and select Update.
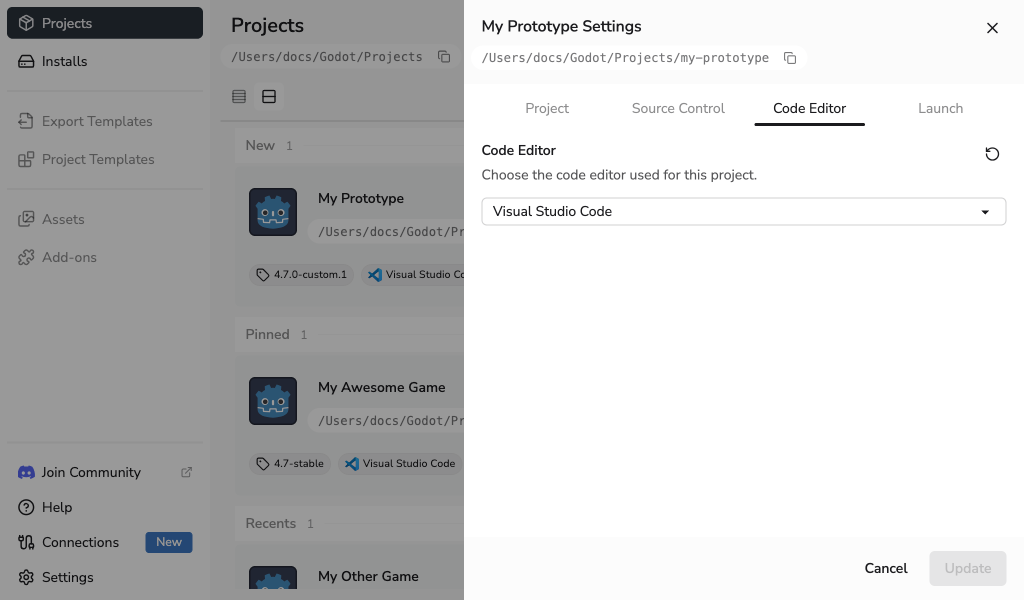
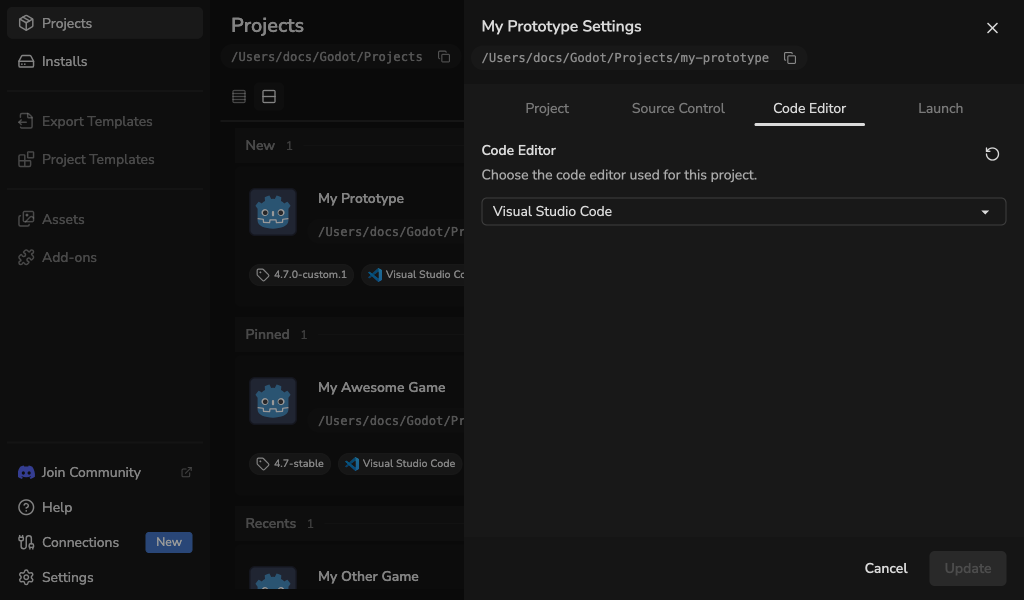
Godot will open project scripts in VS Code. The launcher also creates or updates the .vscode files used by the integration.
Choose None to stop using a code editor for the project. Existing .vscode files stay in place.
Workspace files and extension recommendations
For a standard Godot project, the launcher can maintain:
.vscode/settings.json, including the matching Godot editor path..vscode/extensions.json, with recommendations for Godot Tools and a Godot theme extension.
For a .NET project, it can also add:
- The Microsoft C# extension to the recommendations.
- A
.vscode/tasks.jsonbuild task. - A
.vscode/launch.jsonconfiguration for running and debugging the project.
Install any extension you want from within VS Code. When the launcher updates these files, it keeps other valid settings, recommendations, tasks, and launch configurations.
For manual Godot Tools configuration, see the Godot Tools extension documentation.
For editor detection and project setup recovery, see Troubleshooting.